
My Very Own Project For n8n
Hi all! Welcome to my very first n8n project for this site. I’m building an automation tool where you can upload your resume as a PDF, and it will refine it based on your current experience. I will go through the process step by step and explain along the way how things interact to better understand how they work.
This is my first n8n project for myself, so the method or pipeline may not be fully optimized. As I continue to grow and learn, I will gain the experience to optimize it with no wasted steps. For this n8n project, I will be using my own n8n on my own server. I may, in the future, write a guide on how to install your own n8n server on a Linux machine. For now, I will just explain the nodes and how your resume in PDF format will get processed through the n8n pipeline.
First, you will need to create a new workflow. I currently have one workflow named Resume, but let’s ignore this, as this is an already finished product.
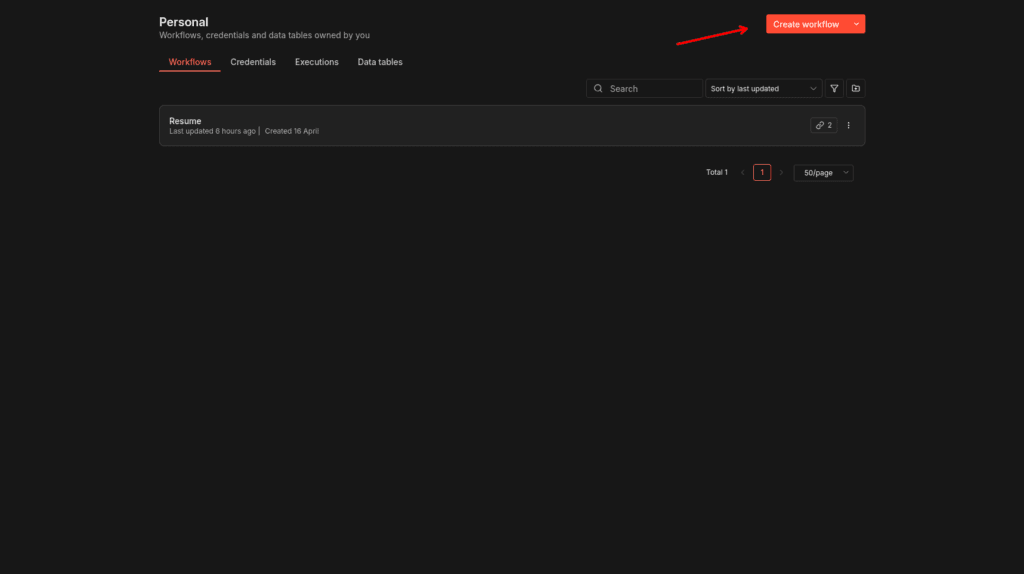
On the top right corner of your n8n screen, there is an orange button with “Create workflow” on it. Click on it to start a new workflow. Workflow is essentially a processing screen where each node interacts with another.
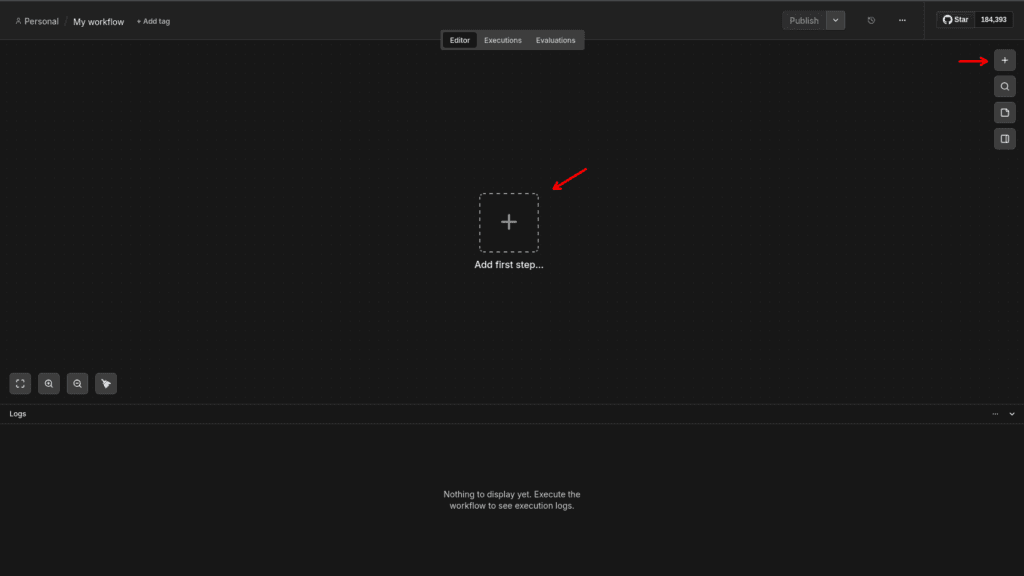
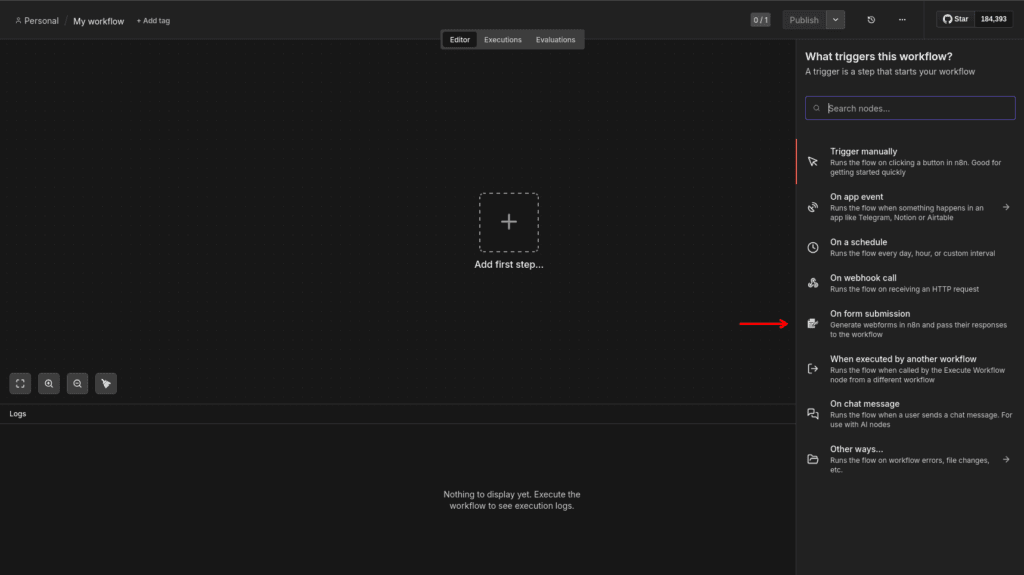
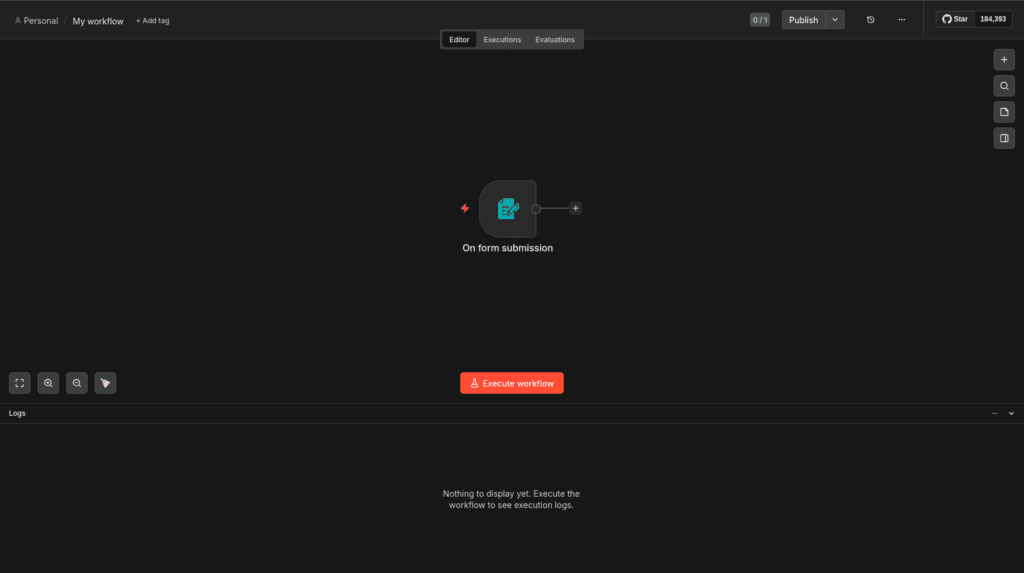
This screen is your workflow. We need to add a node that will process your resume and pass it along to other nodes in the pipeline. Click on the “+” at the center of the canvas. You can also use the one on the top right corner, too, if you prefer. Once you click “+” at the center of the canvas, the right sidebar will appear. Click on “On form submission” from the menu.
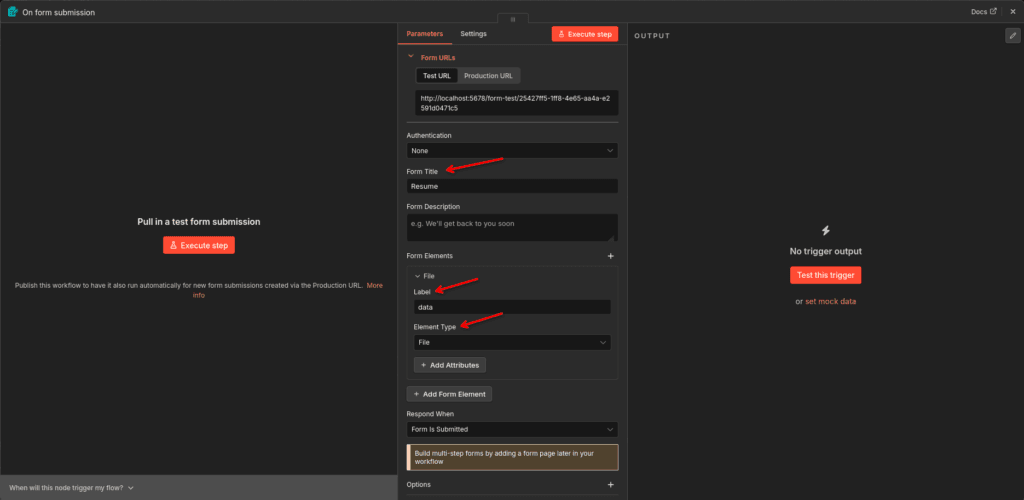
This is the configuration page, or the correct terminology for it would be the parameters of the “On Form Submission” node. In this configuration, we need to have Form Title, Label, and Element Type configured. You can put Resume as the form title. It doesn’t really matter much compared to the Label and Element Type under the Form Elements tab.
Enter “data” for the label in all lowercase. It is case sensitive. What this label does is allow other nodes to pick up on what this node is trying to pass. You can also change this to anything you prefer, as it does show up on the form where we upload our resume. Scroll down to “File” from the drop-down menu under Element Type. This will allow us to upload our resume through the n8n form submission.
The file, or in this case our resume, will be stored in n8n VRAM when submitted through the n8n form submission. VRAM stands for Virtual Random Access Memory. What this does is it temporarily stores data into a virtual memory that will be pulled from when needed, but will also erase everything once the session ends.
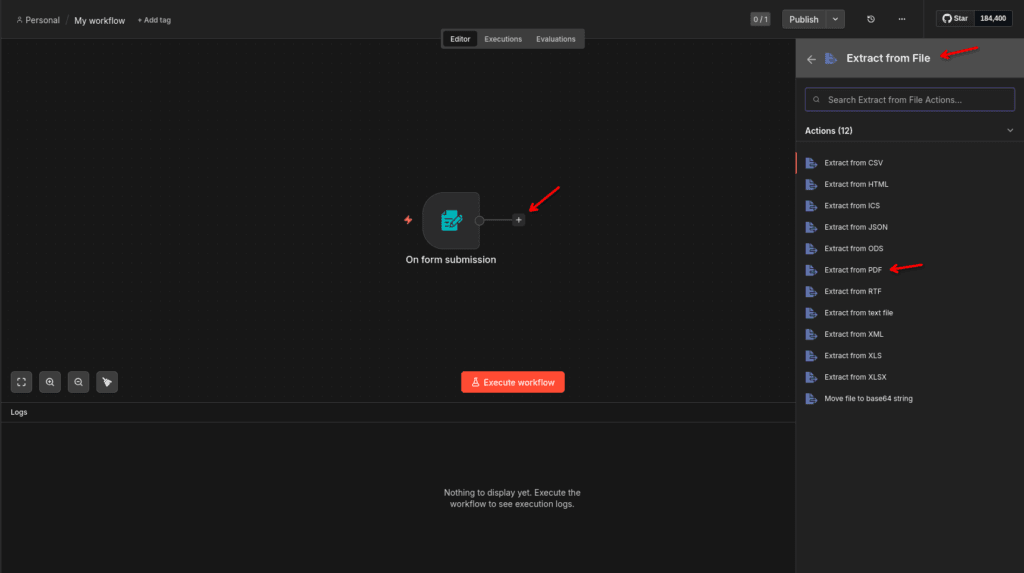
Now, we need to add the “Extract from PDF” node next to the “On form submission” trigger. What this node does is turn a binary file, such as a PDF, into JSON format. This step is needed because we want our AI Agent to be able to read our resume. AI Agent is the one that processes and delivers what we want it to do with our resume.
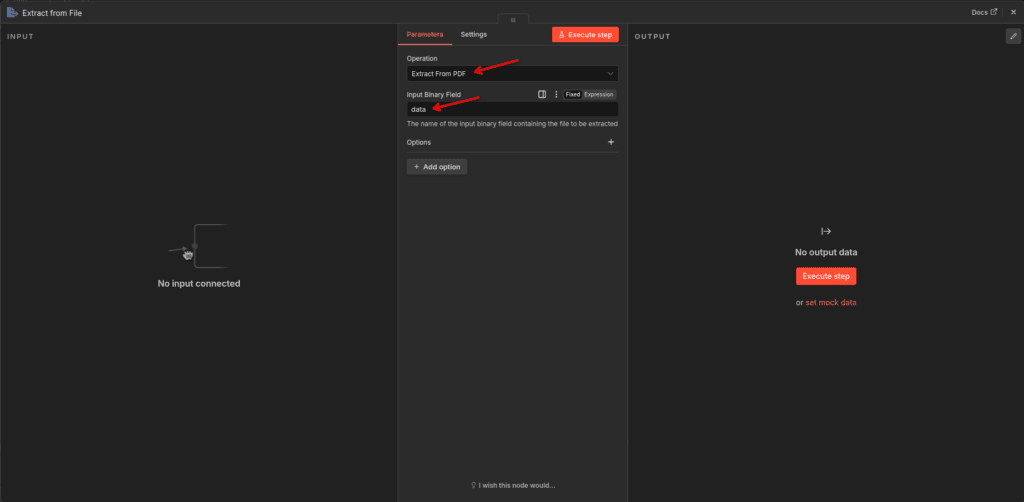
In the parameters of “Extract from PDF”, we need our Input Binary Field to be “data” in all lowercase. Remember the “data” that we input from the previous node under Label? This will allow the “Extract from PDF” node to search, read, and process the resume we uploaded to the n8n form submission.
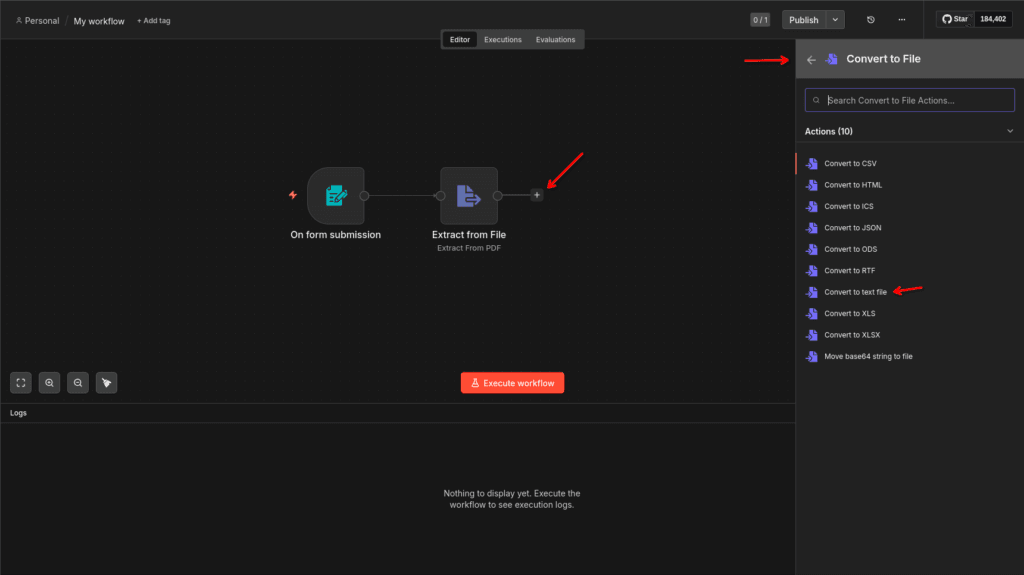
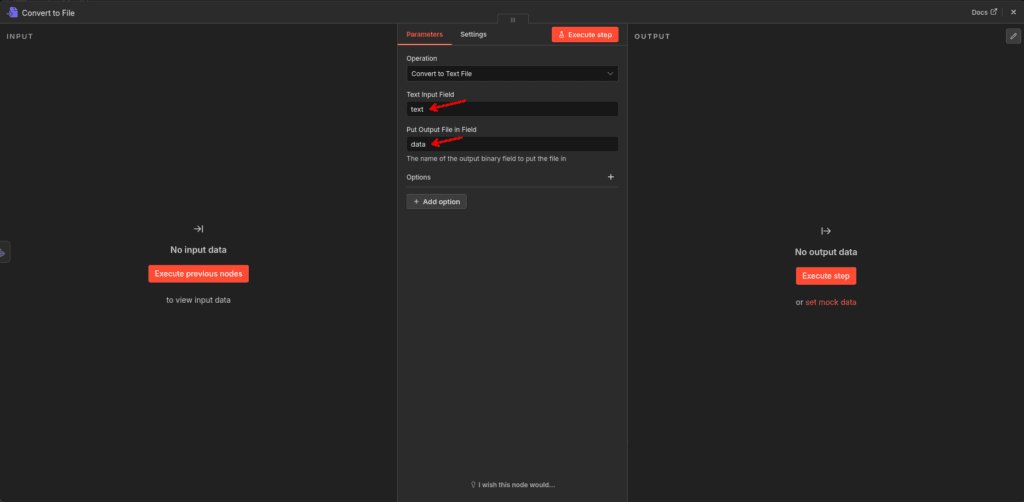
Next, we shall add “Convert to Text File” next to the “Extract from PDF” node. What this does is convert JSON format back into a binary file, but in the form of text. This might seem redundant at first, but it’s not. The AI Agent is able to read JSON format, but not as clearly as raw text from this node. In the case we do skip this step, the AI Agent might miss out on some important information from the uploaded resume. By adding this extra step, the AI Agent is able to scan the resume in its entirety.
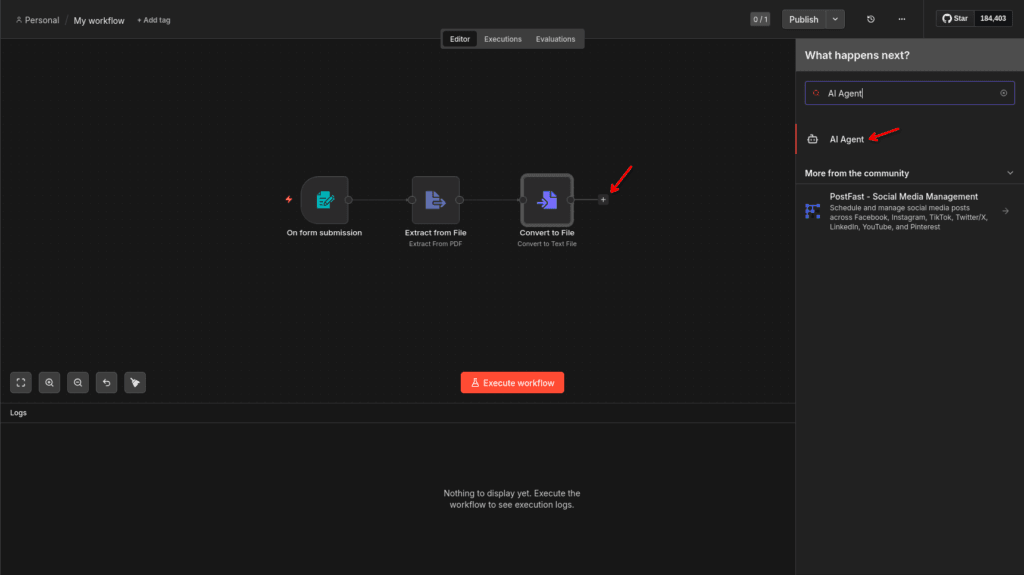
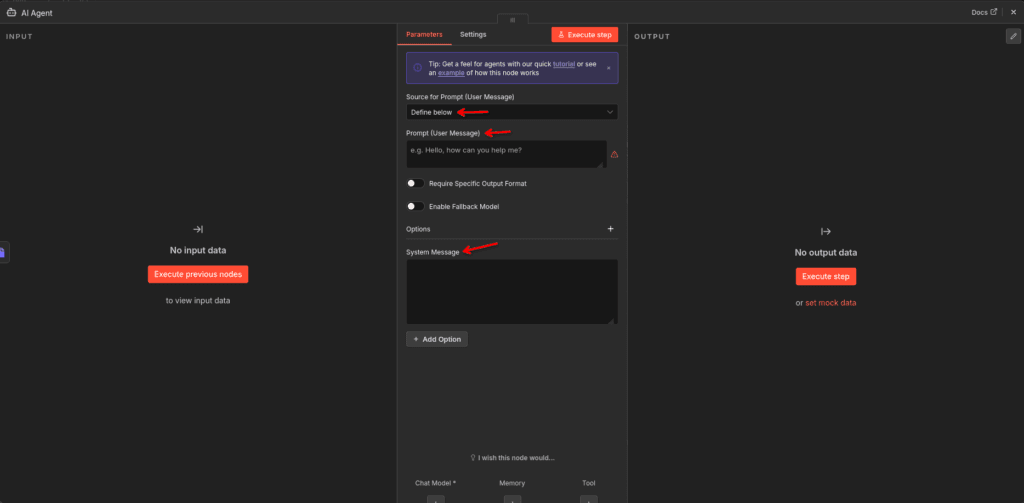
This is the most important node in this workflow and might take some time to configure correctly. We need to switch from “Connected Chat Trigger Node” to “Define below” under the “Source for Prompt (User Message)” as we will not be using a Chat Trigger node for this.
Enter what you want the AI Agent to do with your uploaded resume in the “Prompt (User Message)”. Whether it be your new job experience that didn’t exist from the uploaded resume, or the education you are currently undertaking. You could also ask it to remove certain things from the resume it has outputted.
The most important part of the AI Agent configuration would be “System Message”. You are telling the AI Agent how to think about the entire process. I’ll put down my standard system message that I’ve used for this workflow. Change it how you see fit.
* Role
You are a professional resume formatter. Output ONLY the raw HTML and CSS code. Do not include any conversational text, headers, or explanations. Start immediately with <!DOCTYPE html> and end with </html>. Ensure the content fits on one standard letter pages.

# Context
< Tell it how the environment is >

# Tools & Capabilities
< Add context on what tools is avaliable and what it can do with it >

# Rules
< Tell it what it can or can't do >

# Output Format
- Output the full HTML including <style> tags with modern resume CSS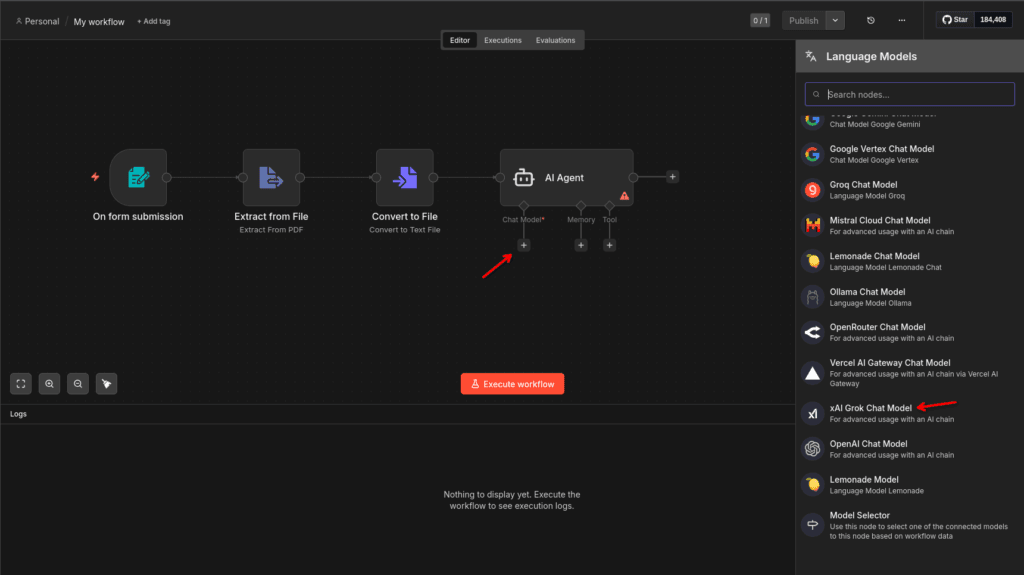
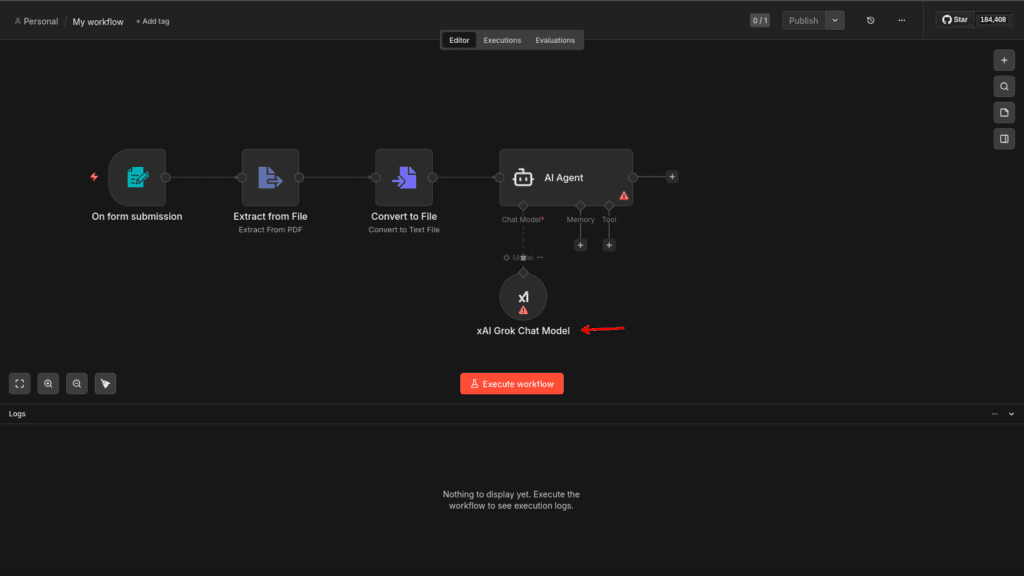
Once you have the AI Agent all configured, next up is the type of LLM Chat you would like to use. The LLM Chat Model is essentially the brain of the operation. It serves as the logic and reason. Some LLM Chat Models do better in certain specific subjects than others. Anthropic and OpenAI rank the top in resume building. I won’t be showing the configuration for this one. Pick one LLM Chat Model to use and enter the API Key associated with it.
There is also an offline version of an LLM Model that can compete with well-known ones such as OpenAI. It is called Qwen, and you need to use it in conjunction with Ollama. In this case, Qwen is the brain of the operation, and Ollama is the driver. However, to get decent results from Qwen, you will need a powerful graphic card with an abundant amount of RAM. Preferably around 48GB of RAM or more. The more RAM the graphic card has, the better it will be able to process its logic and reason. The older graphic card with 6-12GB of RAM isn’t worth it, and the output results will frustrate you.
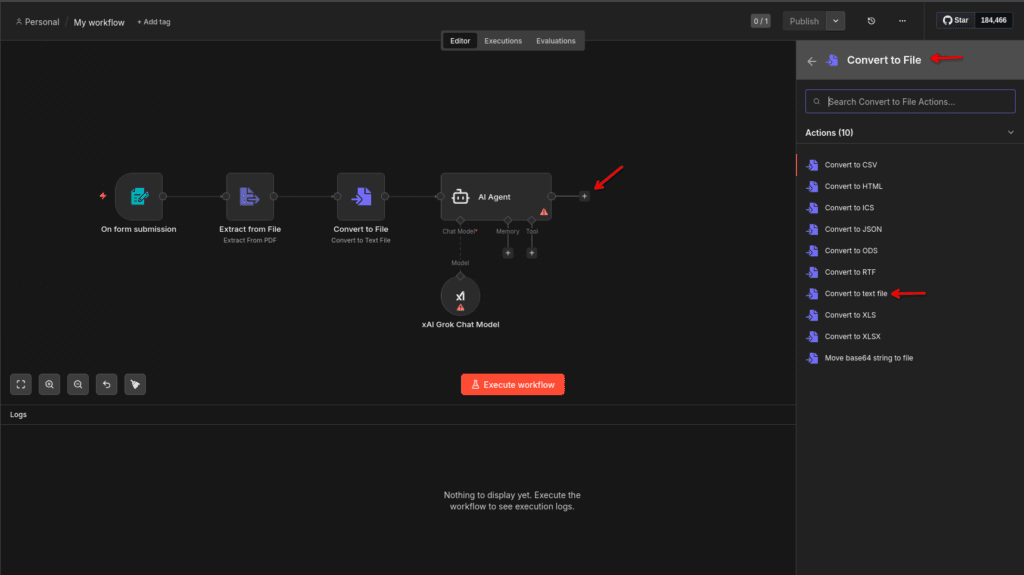
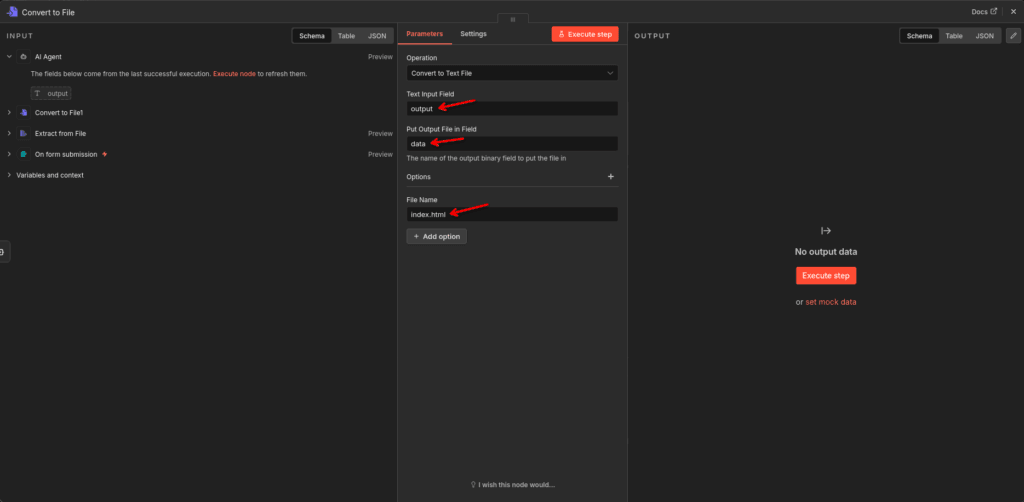
This is the second-to-last node of our resume workflow. The AI Agent will process and refine our resume to our needs through fixed user messages and system messages. It will pass our data to the next node in HTML and CSS-structured text. We will need to use “Convert to Text File” again to process this data and convert it to an HTML extension.
In the Convert to Text File parameters, type in “output” in all lowercase. What this does is it will only draw text outputted by the AI Agent and nothing else. Then, we must put in “data” under “Put Output File in Field”. Essentially, we are saying that whatever gets processed from the previous node will be turned into a binary format for the next node to use. For the last step to this configuration, we need to name this file. Choose whatever name you desire and add HTML as an extension at the end.
Adding HTML as an extension at the end will convert all the HTML and CSS-structured text to a beautiful layout that was produced by the AI Agent. Without it, your resume will look scrambled up.
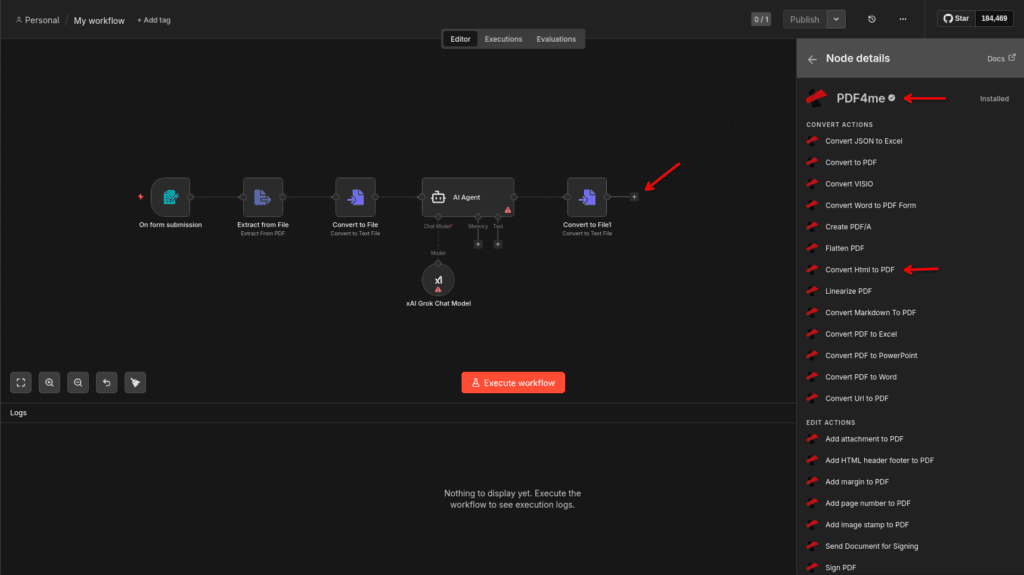
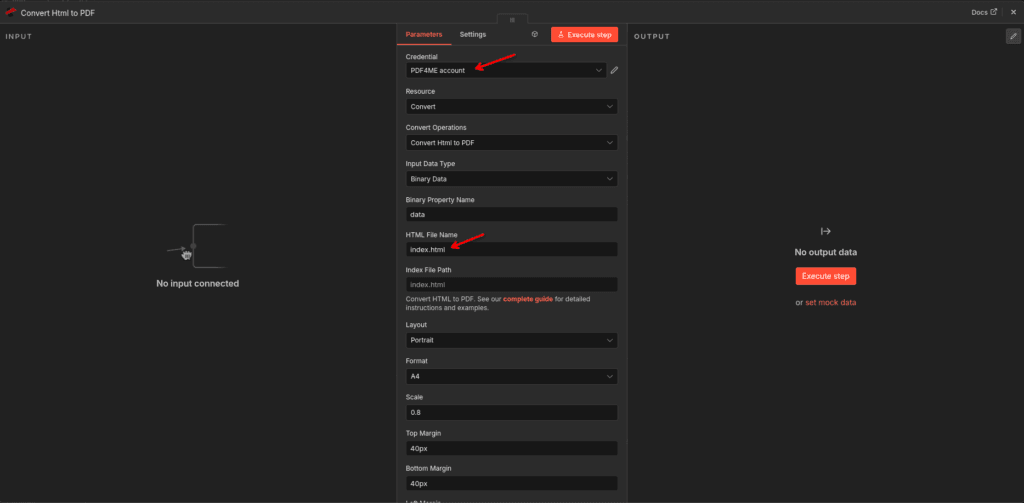
This last node depends on what you want to use. You can use Gotenberg to convert HTML to PDF, which is completely offline, but requires some knowledge to set up and allow Gotenberg to communicate with n8n in a separate network. Or you can use a cloud version like PDF4ME, which then requires you to pay after reaching a certain threshold of usage.
For this workflow, I went with PDF4ME to convert HTML to PDF. I believe the configuration is straightforward from here. Sign up and enter your API Key in the credentials. Adjust the layout to your liking using the parameters in the configuration.
This workflow will allow you to process and update your resume with your current experiences. If there are any questions, please leave a comment below or use the contact form.